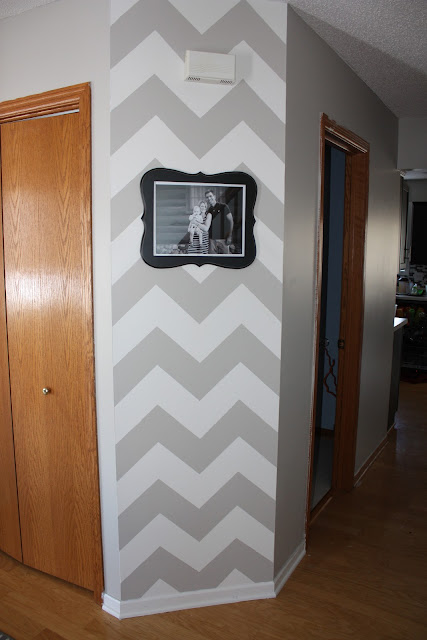
I loved all the awesome chevron walls I saw on pinterest and knew I wanted to have a chevron wall in my house. Originally, I was going to do a chevron wall instead of the chalkboard wall in the eat-in kitchen area, but felt it may be too busy. There was this blank, boring wall in the entryway area that was calling for something special. Since it sticks out a bit more than other walls, I thought a chevron wall would make it more of a feature wall.
My first step was to do some research and read up on how to do a great chevron pattern on a wall. Next, I painted the wall white.
Then, I collected some supplies to help me with the measuring of the lines and patterns. I grabbed a ruler, level, painters tape, measuring tape, laser level, two colors of crayons, some paper and a pencil and a calculator. I measured the wall out and figured out how I should divide the wall up for the grid. I could not tell you what those measurements were and this was probably my least favorite part... I just hate math! Every wall is different and based on how far you want the stripes spaced out would depend how you would measure it and grid it out.
After I had my measurements figured out, I used a green crayon to draw the lines, making a grid using the help of the laser level. I used crayons instead of pencil so that the lines would be easy to erase with a magic eraser.
Next, after the grids were in place, I used the ruler to draw with a purple crayon, a zig zag design by making diagonal lines from the opposite corners of the grids.
After the chevron pattern was all drawn on the wall, I wrote which stripes would be black and which would be white. I then did the big task of taping. I taped the outside lines of the marked black stripes, getting the wall ready to paint.
I painted the stripes and then removed the tape. This was the results. After living with the wall for a few days, I realized I didn't like it. Ahh! So much work to not like the results. Some how it reminded me of Charlie Brown's shirt.
I still badly wanted a chevron wall, so I taped the wall exactly like I had it before - outside the black lines. I decided to use the light gray paint, Revere Pewter, that I was using through the hallway instead of the black.
I LOVED the results. It was softer and not so in your face. I had a few places I needed to touch up when the tape came off, but the crayon easily cleaned off the wall.
The fabulous chevron wall!


I love that you had to use math to do this project!! Looks awesome! Mrs. Nikkel
ReplyDelete